
You've definitely used VPN or other remote access tools like TeamViewer if you've ever needed remote access to a PC. This type of software, on the other hand, can only work within the remote machine's operating system, which means it can't access the BIOS, reboot, install an operating system, or turn on the computer. There are a number of ways to remotely manage a PC regardless of its operating system, but utilising a KVM over IP is one of the most easy and cost-effective options.

While a store-bought KVM over IP device might cost hundreds of dollars, you can make your own using a Raspberry Pi. Maxim Devaev, a developer, created his own system dubbed Pi-KVM, which he plans to offer as a $130 kit. If you have the proper parts, though, you can utilise the software he's created and your Pi to put it together for a lot less.
How to Make a Raspberry Pi KVM Over IP

What You'll Need to Make a Raspberry Pi KVM Over IP
- Raspberry Pi 4 or Raspberry Pi Zero
- A microSD card with a capacity of 16 GB or more is required. (Genuine microSD cards for Raspberry Pi.)
- A HDMI-to-CSI bridge, or a USB HDMI capture dongle are also options.
- Type-A female to Type-B male USB cable
- Type-A to USB C cable
- Power supply with USB Type-A output, 5V, 3 amps. Because you'll be using a type-A connection, the official Raspberry Pi power supply won't suffice.
Setting Up the SD Card for KVM Over IP on the Raspberry Pi

- Save the Pi-KVM disc image to your computer. The first thing we'll need to do is go to pikvm.org and get the ready-made image. There are several versions depending on the Pi you're using and if you're using an HDMI-to-CSI bridge or an HDMI-to-USB capture dongle. You'll need to uncompress the picture file because it's in BZ2 format.
- Open the BZ2 file you obtained and extract the IMG file. BZ2 support isn't built-in to Windows, but you can use 7Zip to get it.
- Open the Raspberry Pi Imager application. You can get it from the Raspberry Pi Foundation's website if you don't already have it installed.
- Go to "Choose OS" -> "Use Custom" and search for the Pi-KVM image. By choosing Choose SD Card, you may select your microSD card. Now we'll "Choose SD Card." Make sure you're selecting the proper one.
- Press the "Write" button.
KVM Over IP Configuration on the Raspberry Pi
- Connect the HDMI-to-CSI-2 bridge's CSI ribbon wire to the Raspberry Pi's CSI camera port. Check to see if the blue marker is facing the black clamp. If you're using an HDMI-to-USB adapter, plug it into a USB port on your Pi instead. You'll need a microUSB to USB Type-A hub if you're using a Pi Zero.
- Disable the 5V pin on one of your splitter's USB Type-A male connections. The best method to achieve this is to cover the connector's right-most pin with a tiny piece of Kapton tape. You may also try cutting the wires that lead to that pin, although it would be more difficult. This is the cable that connects to a USB port on the computer you want to manage. If you don't deactivate the 5V pin, your PC will get electricity from your wall outlet, perhaps damaging its USB port.
- Connect the USB C-to-A cable to the splitter's Type-A female connection. The Pi will be powered by this. Your cables should resemble the illustration below.

- Plug the USB-C cable into the USB-C port on the Raspberry Pi 4.
- Connect your power source to the unaltered Type-A male.
- Connect the USB Type-A connection and HDMI cable to the PC you want to operate with the remote.
- Insert the microSD card we made into the Raspberry Pi and turn it on.

Configuring the Pi-KVM Software
- Find the IP address of your Raspberry Pi. You may accomplish this by checking via your router's control panel to see what devices are connected, or by utilising a technique called ARP, which I like to use.
- Open a browser on your client computer and go to the Pi's IP address (the one you are using to control the other PC). You will be sent to your account login page.
- Log in to your account. Admin is the default username, and admin is also the default password.
- Select the KVM icon from the drop-down menu.


Pi-KVM is being updated to the latest version.

- From the Pi-KVM main menu, select the Terminal icon. A command-line interface (CLI) shell will emerge.
- Type "su" and then "root" as the password to become a super user.
- To make the file system read/write, type “rw.”
- To obtain updates, type "pacman -Syu" and "Y."
Pi-KVM may be accessed over the internet.
- Sign up for a Tailscale account and select the Solo Plan. This plan is free for personal usage only.
- From the Pi-KVM main menu, select the Terminal icon.
- Type "su" and then "root" as the password to become a super user.
- To make the file system read/write, use “rw.”
- To install tailscale VPN service on PI-KVM, type "pacman -S tailscale-pikvm."
- To do a gentle reboot on the Pi-KVM, type "reboot."
- We'll need to get access to the terminal after the reboot, so go through steps 1-4 again.
- To enable the service, type “systemctl enable —now tailscaled.”
- To begin the commencement procedure, type "tailscale up."
- To authorise this installation, click the link.
- The terminal will display "Success" once you have successfully connected.
- To see the IP address given by tailscale VPN, go to https://login.tailscale.com/admin/machines.
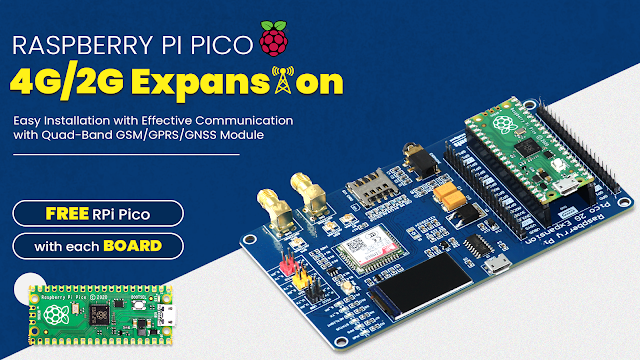
The techies over at @sb_ltd have launched a crowdfunding campaign which gives the @Raspberry_Pi Pico a 2G GSM modem - plus Bluetooth, a small display, GNSS, and a range of other bonus features. https://t.co/yK5WzFX6UC
— Gareth Halfacree (@ghalfacree) July 27, 2021
From the client's perspective
- Go to https://tailscale.com/download and download tailscale for your operating system.
- To see the IP address given by tailscale VPN, go to https://login.tailscale.com/admin/machines.
- Using your browser to navigate to the IP address provided by tailscale. It will establish a connection to your PI-KVM (https://tailscale IP).
Posts You May like:
- How to Use a USB SSD or Flash Drive to Boot a Raspberry Pi 4 / Pi 400
- Filter Ads by your Raspberry Pi Before they Reach your Devices
- A Raspberry Pi 4 Model A Launch 2022 - Eben Upton
- First-Ever 2G Expansion Board for Raspberry Pi Pico has Launched on Kickstarter
- Learn IoT "Internet of Things" with 24 lessons for Teachers and Students
- Quick Guide for Raspberry Pi Users: Raspberry Pi Terminal Commands
- Windows 11 on Raspberry Pi Devices in Easy Installation Guide
- Get Your Project Done by Raspberry Pi Approved Design Partners
- PiRelay 8 Smart Relay Board for Raspberry Pi - Kickstarter
- Tiny Round/Circular LCD Display Launched!
- Issue Fixed! USB Boot Ubuntu Server 20.04 on Raspberry Pi 4
- HC-SR04 Sensor with micro-ROS on the Raspberry Pi Pico
- Raspberry Pi Pico: ADC Sampling and FFT
- Using CircuitPython for RP2040
- How to Setup Pico RP2040 on Windows
- Using micro-ROS on the Raspberry Pi Pico
- LED Tricks Using The Raspberry Pi Pico
- The RP2040 Raspberry Pi Pico Meets LoRa
- Pico supports SD cards and FatFS
- How to connect a Raspberry Pi Pico to LoRaWAN
- 50 Raspberry Pi Hacks & Tips You Should Know
- How to Install Wi-Fi and Internet on a Raspberry Pi Pico


