
The 🛒Raspberry Pi Build HAT is an add-on board that connects to your Raspberry Pi's 40-pin GPIO header and was created in partnership with LEGO® Education to make controlling LEGO® TechnicTM motors and sensors with Raspberry Pi computers simple.
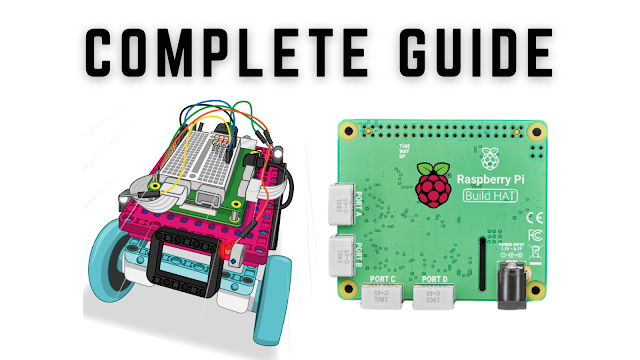
It includes four connectors for SPIKETM Portfolio LEGO® TechnicTM motors and sensors. A distance sensor, a colour sensor, and a versatile force sensor are among the sensors available. The angular motors are available in a variety of sizes and have built-in encoders that may be used to determine their location.
 |
| Preparing Raspberry Pi Build HAT |
The Build HAT is supported by the LEGO® Education SPIKETM Prime Set 45678 and SPIKETM Prime Expansion Set 45681, both of which are available separately from LEGO® Education resellers.
NOTE: All 40-pin GPIO 🛒Raspberry Pi boards, including the 🛒Raspberry Pi 4 and 🛒Raspberry Pi Zero 2 W, are compatible with the HAT. It can also be utilised with Raspberry Pi 400 with the addition of a ribbon cable or other extension device.
- Up to four LEGO® TechnicTM motors and sensors from the SPIKETM Portfolio can be controlled.
- Control your LEGO® TechnicTM devices with this simple Python library.
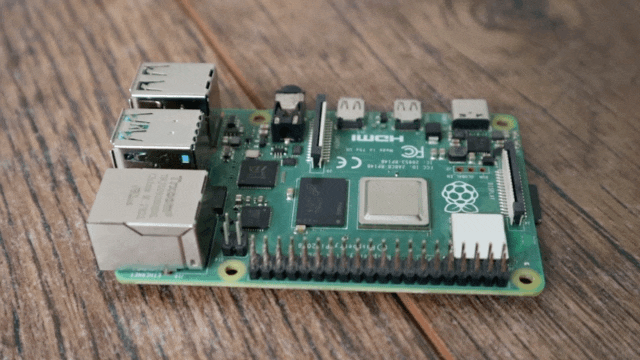
- Any Raspberry Pi computer with a 40-pin GPIO header will fit.
- Low-level control of LEGO® TechnicTM devices is managed by an onboard RP2040 microcontroller.
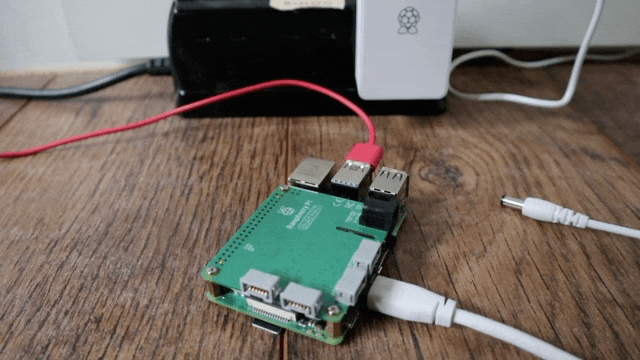
- A separate 8V PSU is available to power both the Build HAT and the Raspberry Pi.
NOTE: The Rapsberry Pi 400 cannot be powered by the Build HAT since it does not support GPIO headers.
You can also follow along with the Raspberry Pi Foundation's projects for Build HAT.
Getting the Raspberry Pi Ready for the Build HAT
Set up your Raspberry Pi and install the newest version of the operating system using Raspberry Pi Imager before you begin working with your Raspberry Pi Build HAT.
Attach 9mm spacers to the board's bottom. The Raspberry Pi Build HAT should be installed on your Raspberry Pi. Make sure it's the proper way up when you put it on. All of the components are on the bottom, unlike other HATs, allowing room on top for a breadboard or LEGO® pieces.
GPIO (General Purpose Input/Output) Pins
If you wish to access the Raspberry Pi's GPIO pins, you may use 15 mm spacers and an optional tall header.
The Build HAT uses the following pins, and you should not connect anything to them.
| GPIO | Use | Status |
|---|---|---|
GPIO0/1 | ID prom | |
GPIO4 | Reset | |
GPIO14 | Tx | |
GPIO15 | Rx | |
GPIO16 | RTS | unused |
GPIO17 | CTS | unused |
Getting your Raspberry Pi set up
Using your Raspberry Pi as a Headless Computer
- If you're using raspi-config to run your Raspberry Pi headless, choose "Interface Options" from the first option.
- Then "P6 Serial Port" appears.
- Disable the serial console by doing the following:
- Also, make sure the serial port hardware is turned on.
- This is how the final settings should appear.
- If you've made any modifications, you'll need to reboot at this point.
The Build HAT's Power Source
Putting the Build HAT Software Together
$ pip3 install buildhatHow to Connect a Motor to Raspberry Piu Build HAT
Motors in the Workplace
from buildhat import Motor

motor_a = Motor('A')

motor_a.run_for_seconds(5)- For 5 seconds, crank your motor clockwise.
- Rerun your programme after changing the final line.
motor_a.run_for_seconds(5, speed=50)- The motor should now spin more quickly. Make another alteration:
motor_a.run_for_seconds(5, speed=-50)- The motor should rotate in the opposite direction (anti-clockwise).
from buildhat import Motor

motor_a = Motor('A')

While True:
print("Position: ", motor_a.get_aposition())- Run the application. Turn the shaft of the engine using your hand. The numbers written in the Thonny REPL should be changing.
Raspberry Pi Buld HAT Sensors
The Use of Sensors
Make a second new programme:
from signal import pause
from buildhat import ForceSensor, ColorSensor

button = ForceSensor('C')
cs = ColorSensor('B')

def handle_pressed():
    cs.on()
    print(c.get_color())

def handle_released():
cs.off()Posts You May like:
- The New Version of Raspberry Pi OS, Debian "Bullseye" is Now Available.
- The Raspberry Pi Zero 2 W Arrives Six Years After The First Pi Zero
- Pico Sense HAT - Raspberry Pi Environment Monitoring Add-on Pico
- Raspberry Pi 4 Has Been Given Vulkan 1.1 Compliance by Khronos
- Raspberry Pi Officialy Announced Build HAT For Raspberry Pi
- Installing Android on a Raspberry Pi 4 with Google Play Store
- Pop OS Linux is Coming to Raspberry Pi and Other ARM Devices Soon
- How to Immediately Upgrade to Windows 11
- A Secret Update for the Raspberry Pi 4 8GB
- Raspberry Pi Introduces a New Documentation Hub
- Quick start with ESP8266 based Pico WiFi HAT
- Capture local Real-Time Air Quality Data with Raspberry Pi Pico
- GitHub CLI 2.0 Is Now Available, With Extension Support
- Connecting Wi-Fi on Raspberry Pi Pico Become Easy
- How To Track All Devices with Raspberry Pi
- Make your own Raspberry Pi Image from scratch
- How to Send phone notifications Using Raspberry Pi Pico?
- Raspberry Pi Pico 4G/2G Expansion : Expectations vs. Reality
- Quick Example to Drive Servo Using Programmable I/O
- How to Use a USB SSD or Flash Drive to Boot a Raspberry Pi 4 / Pi 400
- Filter Ads by your Raspberry Pi Before they Reach your Devices
- A Raspberry Pi 4 Model A Launch 2022 - Eben Upton
- First-Ever 2G Expansion Board for Raspberry Pi Pico has Launched on Kickstarter
- Learn IoT "Internet of Things" with 24 lessons for Teachers and Students
- Quick Guide for Raspberry Pi Users: Raspberry Pi Terminal Commands
- Windows 11 on Raspberry Pi Devices in Easy Installation Guide
- Get Your Project Done by Raspberry Pi Approved Design Partners
- PiRelay 8 Smart Relay Board for Raspberry Pi - Kickstarter
- Tiny Round/Circular LCD Display Launched!
- Issue Fixed! USB Boot Ubuntu Server 20.04 on Raspberry Pi 4
- HC-SR04 Sensor with micro-ROS on the Raspberry Pi Pico
- Raspberry Pi Pico: ADC Sampling and FFT
- Using CircuitPython for RP2040
- How to Setup Pico RP2040 on Windows
- Using micro-ROS on the Raspberry Pi Pico
- LED Tricks Using The Raspberry Pi Pico
- The RP2040 Raspberry Pi Pico Meets LoRa
- Pico supports SD cards and FatFS
- How to connect a Raspberry Pi Pico to LoRaWAN
- 50 Raspberry Pi Hacks & Tips You Should Know
- How to Install Wi-Fi and Internet on a Raspberry Pi Pico


